MenuClose
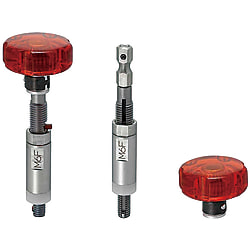
Inserts - Tangless Insert Installation and Removal Tools
Click this image to zoom it.
Move the mouse over the image to zoom
- Volume Discount is available
• Category: Tool
Edit Part Configuration
Part Number
Configure to get your Part Number

Specifications
| Part Number | - | L |
| TLTS2.5 ENT3 ENTP5 TLTP10 | - - | 5 6 |
■Insertions, Removal Tools
· No damages on the threads and bodies at removal.
· No need for breaking tangs off and looking for broken tangs, or checking gauge positions.
| Part Number | D | L | |
| Type | No. | ||
| TLTP (Insert Tool) TLTN (Removal Tool) | 2.5 | 6.0 | 69.0 |
| 3 | 6.8 | 68.5 | |
| 4 | 9.0 | 75.8 | |
| 5 | 9.7 | 78.6 | |
| 6 | 11.0 | 78.1 | |
| 8 | 13.0 | 98.4 | |
| 10 | 15.5 | 104.4 | |
· No need for breaking tangs off and looking for broken tangs, or checking gauge positions.
Part Number Being Previewed:
- Please use our configuration tools to update this preview to your specific part.
Loading...
| Part Number |
|---|
| TLTN2.5 |
| TLTN3 |
| TLTN4 |
| TLTN5 |
| TLTN6 |
| TLTN8 |
| TLTN10 |
| TLTP2.5 |
| TLTP3 |
| TLTP4 |
| TLTP5 |
| TLTP6 |
| TLTP8 |
| TLTP10 |
Loading...
Specifications/Overview

Figure 1) attach the red (or blue) handle to the hexagonal shank of the insertion tool and loosen the double nut.
Fig. 2) turn the tongueless on the threaded part of the tip of the tool until the claws of the tool and insert are caught. At that time, since the tongueless has no direction, it can be installed from either side.
Fig. 3) adjust the loosened double nut to correspond to each nominal length so that the gap between the white resin part and the tongueless end opens by one thread, and fix it with the double nut part. please.
Fig. 4) align the tool so that it is perpendicular to the base material, and insert it while rotating it without pressing it strongly.
Fig. 5) when the resin part comes into contact with the base material and does not rotate, turn the tool over. At this time, please note that the resin part will crack if you continue to turn it strongly after hitting the base material.
Figure 6) insertion is complete when the tool is separated from the base material.
Basic Information
| Category | Tool | Application | Light Metal | Operating Environment | Manufacturing Equipment |
|---|---|---|---|---|---|
| Sale Unit | Low Quantity Available beginning with 1 pc. | Material Certificate | N/A |
- The specifications and dimensions of some parts may not be fully covered. For exact details, refer to manufacturer catalogs .
Additional Products in this Category
- Inserts - Tapping Tools for Tangless Inserts
- Inserts - Tangless Insert Replacement Tool
- Inserts - Tangless Insert Manual Prewinder Tool
- Inserts - Tangless Insert Removal Tool (for Locking), Metric
- Inserts - Tangless Insert Mandrel Installation Tool, Coarse
- Tangless Insert Spiral Tab
- Dedicated Electric Tool For Tangless Insert
- Tangless Insert Sliding T Handle Socket


How can we improve?
How can we improve?
While we are not able to respond directly to comments submitted in this form, the information will be reviewed for future improvement.
Customer Privacy Policy
Thank you for your cooperation.
While we are not able to respond directly to comments submitted in this form, the information will be reviewed for future improvement.
Please use the inquiry form.
Customer Privacy Policy